Showing posts with label crafty. Show all posts

2.20.2013

A Valentine craft {that didn't make me crazy}

I wanted to do something a little different for the girls' Valentines this year.  With 17 kids in their class at MDO, the candy can get overwhelming pretty quickly.  I end up throwing quite a bit away or eating it myself...and I hate to waste valuable calories on so-so Valentine candy.  (A delicious homemade cupcake, on the other hand, is totally worth it.)

After a lot of thought-and Pinterest searching-I decided on something I already knew how to do.  Inspired by Marcia's mini-book projects, I decided to let the girls make Valentine notepads for their classmates.  It went quite well, especially since I glued the first sheet onto the cover myself the night before.

Then, I dumped out a $5 box of foam heart stickers and let the girls go to town.  I offered to help remove the paper backing, but they quickly informed me that they had "already used these stickers at school" and knew exactly how to do it...and they did!  


A & M had a blast covering the notebooks (and themselves), and I pretty much kept myself under control and let them do it they way they wanted.  I only suggested limiting the hearts to 3-4 per book.  (You know I couldn't stay out of it completely!)

We were all happy with the finished product.  From the other child (I honestly can't remember who gave out which Valentines, and I mixed it up from the way we had agreed on anyway.  Thankfully, A & M got over it quickly.), we went with a simple Rice Krispie treat cut into a heart shaped and tied up in a Valentine bag.


Valentine's Day 2013=success!

2.22.2012

I made a skirt (yes, really!)

The major item on my Christmas wishlist last year was a new sewing machine.  Jeremy took heed of my not-so-subtle hints and procured a sewing machine for me.  (Actually, I just realized that I got everything on that wishlist, except for the Veronica Mars DVDs...awesome!)

As soon as the dust settled from our Christmas morning celebrations, I pulled my new sewing machine out of the box and sat down with the manual to learn how to get started.  Much to my surprise, it went pretty smoothly.  By the end of the weekend, I was trying out different stitches on scrap pieces of fabric, practicing sewing straight lines and curves.

My sister and I worked on these headbands/bracelets, and I made a few other "scrap bracelets" for the girls.  Laura (who took a sewing class many years ago, at maybe 13 or so?  She has always been more 'domestic' than me) told me to sew something together, promising it would make me feel very accomplished, and she was right.  I had have a long way to go, but I was proud of myself for even learning how to thread the machine!

I haven't had a whole lot of time to devote to sewing in the weeks since Christmas, but I do pull it out occasionally when I have a free hour or two.  I have pinned lots of ideas to my Learn to Sew board, but so much of it is either way out of my league or would require time I just don't have right now.

When the girls decided they want a Wizard of Oz-themed birthday party, I began to consider the idea of making them blue gingham skirts and matching "3" t-shirts.  I set off looking for a simple skirt pattern.  I quickly found this one, via Pinterest of course, and marked it as something I might be able to accomplish.  Though the girls have now set me straight on the fact that Dorothy wears a DRESS, not a SKIRT, I kept the idea in mind.

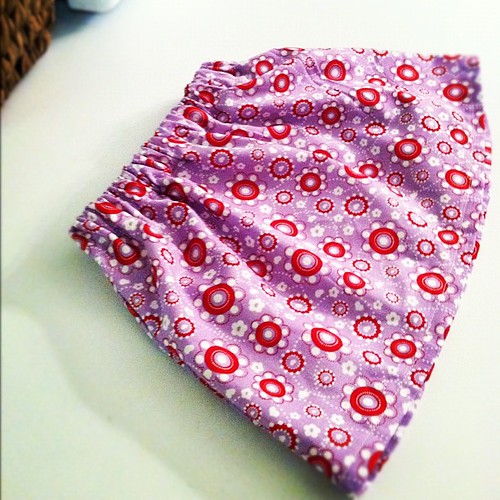
Saturday night I pulled out some fabric and pulled up the tutorial on my computer.  I guessed at the measurements, and went a little shorter in length in order to use the fabric I had on hand, but within two hours, I had produced...

I made a skirt!

an honest-to-goodness, fairly decent-looking skirt!

I knew Mackenzie would love it--she loves purple--and I was right.  She couldn't wait to try it on.   To my (and Jeremy's) amazement, it fit!  Mackenzie was carried away with her new skirt, and wore it over her pajamas all afternoon.  (We all usually change back into pajamas after church on Sunday...it's my favorite afternoon of the week.)

Naturally, I couldn't wait to try again, so I let Addison pick out fabric for her skirt on Sunday night.  I made this one a little longer and a little fuller, and I am happy to report that it took much less time...maybe an hour total.  

My Mackenzie is a little obsessed with skirts and dresses, or "ballerinas", as she calls them.  When she saw that the second skirt was fuller and slightly more poufy (like a ballerina's should be, I guess), she quickly negotiated a trade with Addison to take over the second skirt.  Luckily, Addison is pretty easygoing sometimes, and agreed without argument.

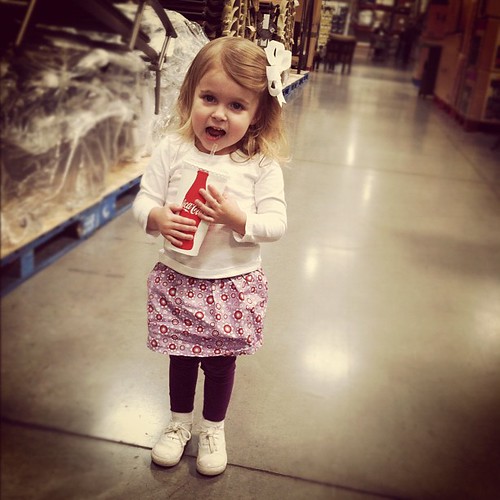
I don't have a good picture of the second one, but Mackenzie is wearing it while trying out a couch at Costco on Monday:


And Addison was perfectly happy with the purple one (and my Diet Coke):


Naturally, my first attempts are far from perfect, but I'm still ridiculously proud.  I MADE something! Stay tuned--it could get all kinds of crafty up in here...

2.21.2012

Monday on a Tuesday

We had a great weekend, complete with an extra day off yesterday.  Friday night, the girls went to spend the night with Jeremy's parents.  We decided to go ahead and eat dinner with his family instead of going somewhere else, since every restaurant seemed to be packed.  Late Valentine's celebrations, I guess...it was ours too!

After dinner, the girls went off with their grandparents and Jeremy and I went to see The Vow.  It was...alright...some things about the characters really irritated me.  Still, it was nice to sit in a theater next to my husband and do nothing but take in the movie for about two hours.

I made a quick Target run right before the movie and ran into a local blog friend (It was great to catch up for a few minutes, Iana!  We should really get our kids together sometime!).  I also snagged this necklace on clearance for $2.40 that I am a little bit in love with:


Twins!
The Gemini symbol (my astrological sign)...also the symbol for TWINS!  : )
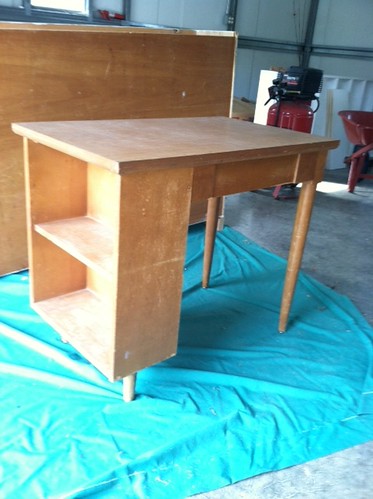
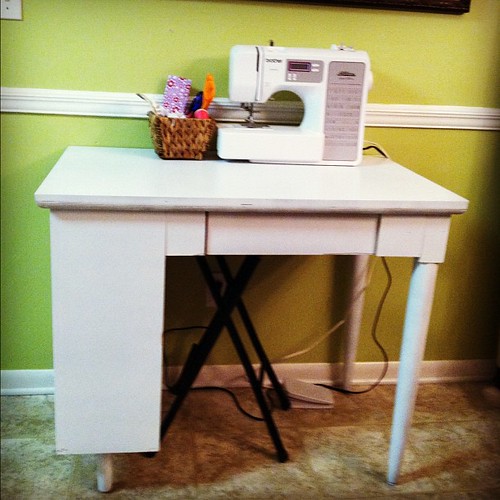
Jeremy and I spent our child-free Saturday morning piddling around the house.  I finally started a project I have been intending to work on for months.  After a morning spent in Jeremy's workshop and one trip to Home Depot, this desk

desk before

became this:

Painted desk

It is still far from perfect, and I have already put a couple of spots on the top (because I didn't wait long enough before setting the heavy sewing machine on it), but it is a great improvement.  I used spray paint and it was pretty easy, so there's no telling what piece of furniture I will attack next!  I do want to make a little skirt for the desk, to hide the cords and stool, and I need some baskets for the open shelves on the end.  I don't really know if the desk is going to stay where it is (in the kitchen) or move somewhere else, but at least it is now in the house and functional.  Progress!

The rest of our weekend was pretty quiet.  We hung out at home, had a fantastic Sunday lunch with just the four of us (a rarity!), and did lots of reading (rainboots optional).

Rain boots

--------------------

Random Addison quote from lunch on Sunday:  "Lucy, you got some 'splainin' to do!"  

I love that my baby quotes one of my favorite shows (I Love Lucy) without having any idea what she's talking about.  (She picked it up from her silly father a couple of weeks ago.)  : )

11.02.2011

Recent Craftiness


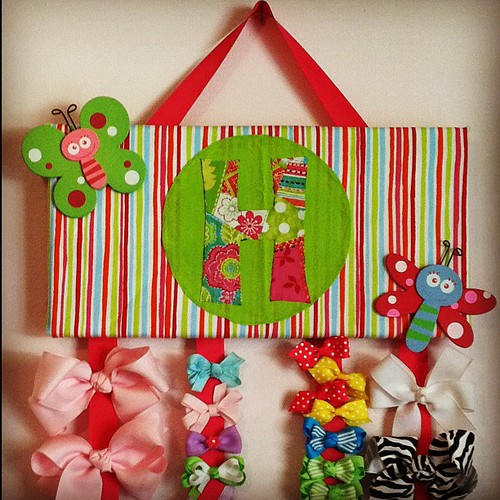
This is the bow holder I made for the girls' room back during the summer.  It was really easy... I wrapped a rectangular canvas in fabric, then hot-glued on the H and circle I had cut from contrasting fabrics (I used fray-check on the edges after I cut them out--I love that stuff!).  I had picked up the two wooden decorations at a craft store sometime or other, and I just used hot glue to attach them also.  I finished it off with four ribbons along the bottom to keep all the hairbows organized.  I was pretty pleased for the first attempt, and it has held up well so far!


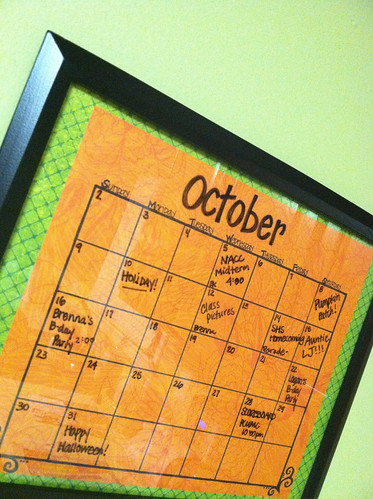
My dry-erase calendar was an adaptation of something I saw on Pinterest, naturally.  I made a few mistakes on this first one, and I'm planning to redo it soon.  It has served its purpose well though, and I enjoy having an easily-accessible calendar in the kitchen.


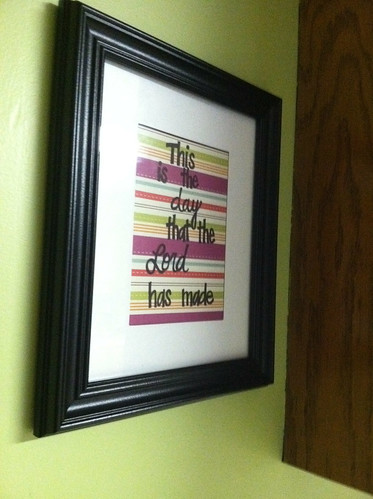
This little picture started out to be a redo of the dry-erase calendar.  I intended to take out the mat and use this frame to make a small calendar for work.  I messed up the lines, though, and since I really liked this paper (it coordinates with some of my fall decorations), I decided to write this verse and put it up through the Thanksgiving holiday.  I actually like where it hangs, so I may just keep a different seasonal phrase/verse up there all the time.


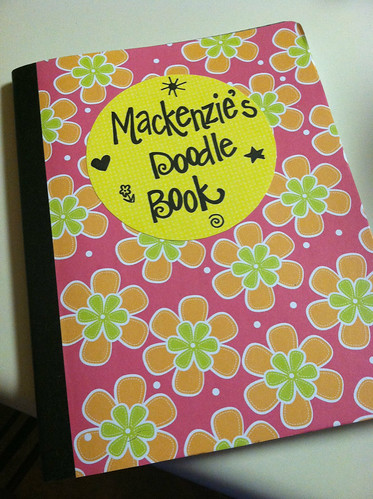
Before our vacation in September, I put together several new activities to occupy the girls in the car.  Inspired by Marcia's notebooks, I made a "doodle book" for each of them to use in the car, restaurants, etc.  (The notebooks are just composition books covered in mod podge and scrapbook paper, with the circle cut from an alternating print and glued on.)  So far, they have been a hit!  I am thinking of attaching a pen on a string so there will be no more lost pens in the car.

What have you been crafting lately?  Is Pinterest inspiring any new projects in your home?  Be sure to check out Marcia's virtual craft link-up for more crafty ideas!

8.01.2011

This Week on Pinterest....

Like so much of the Internet, my love affair with Pinterest continues.  It's just so fun to see all the different tastes colliding and the amazing things people can do.

I have surprised myself (and probably my family) by actually carrying out a few of the ideas I found on Pinterest, and I have many more plans in the works.  (Which I think is a natural course of events after you sign up for an account, am I right?  We all want to build a new house, make something crafty with mason jars, and find a spot for a cozy little reading nook.)

What I've tried so far:


These DIY coasters were very easy and fun to make.  Just a few ceramic tiles, some scrapbook paper, Mod Podge, and clear spray paint and I can have fun for hours.  I made a couple to experiment with, and now I'm stocked up on tiles and ready to try some more.  I added a monogram and a quotation on a couple, and they turned out well too.  (I just used a permanent marker on the scrapbook paper before gluing it onto the tile.)

I have marked quite a few recipes to try, but the one I have tried so far was a hit with both Jeremy and the girls:


I made these little roll-ups with turkey and cheese, and Addison & Mackenzie thought they were the most fun "sandwiches" they'd ever had.  I added chopped onions into mine one night, then used broccoli when we had them this weekend.  There are lots of possibilities, and I'm glad to have found a quick and easy meal the girls will eat!


I haven't made them yet because I keep forgetting to pick up an apple corer, but I'm kind of obsessed with these little apple sandwiches.  Aren't they cute?  I think instead of granola, I will use dry oats.  This would be something I could really enjoy for breakfast.


This desk skirt is my inspiration for my own furniture project that I hope to accomplish this week.  I have a midcentury-style desk that I have long planned to paint and use in the kitchen.  I need a permanent place for the laptop and external hard drive...instead of on the floor under the edge of the couch.  When I saw this desk skirt, I realized that would be the perfect way to hide the cords, etc., so the desk can be functional but still cute.  I am looking for just the right fabric to make the skirting (okay, have someone make is more like it!), possibly one I can also use for a valance over the kitchen window. 

The spot I plan to put the desk has long been occupied by the girls' high chairs, so I have been waiting for them to be outgrown until I really started this project.  We have the convertible/booster style chairs that strap onto our regular chairs, but the arms were too high to fit under our table.  The other day I came across some smaller booster seats for $10 each and decided it was time to make the switch.  


We're still working on not using the big table as a high chair tray (meaning no smearing ketchup all over it, for one thing), but a couple of kid-friendly placemats should help with that.  Now that the spot is free, I am ready to get to work on my desk.  I picked up the supplies last night and I hope to at least get it painted this week.

Pictures to come, of course!

What are your favorite things on Pinterest right now?  Any Pinterest-inspired projects complete yet?

2.09.2011

No-Sew Applique

Back in the fall, I mentioned that I have a love affair with pretty, bold-printed fabrics.  However, I am pretty clueless when it comes to sewing machines...or sewing in general, as evidenced by the fact that my poor husband has to repair his own shirt buttons when they fall off!  But hey, you gotta love a man who is capable enough to do it, right?

I am now the proud owner of my very own sewing machine, thanks to my mom's yard-sale-browsing skills.  It is an older model and I haven't a clue how to go about even getting thread in the darn thing, but I will learn.  In fact, I am going right now to add that to my list of goals for this year.  (I suppose I should start scouring eBay for a user's manual that might tell me how to get started.)

In the meantime, I have found a way of exhibiting my love of fabric and my desire to make cute, crafty things for my girls to wear without the need for a sewing machine.  No-sew appliques are a cheap and easy project, and I thought I would pass the idea on to anyone who might be interested.

This week, I made Valentine's shirts for the girls.  Here are the step-by-step directions, complete with pictures...

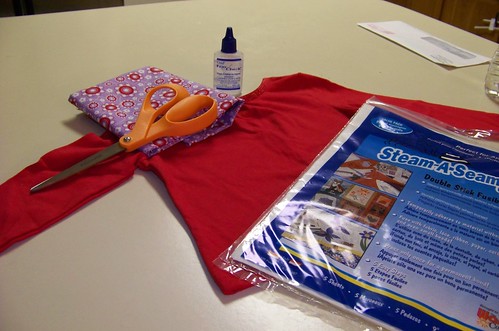
First, the materials....

100_1962

You will need:
-- fabric (a quarter-yard or less should be more than plenty for most projects)
-- the item you will be applying your applique to (I used a $3.50 red shirt from Wal Mart)
-- a good pair of scissors (I did not realize how important these were to fabric projects, but I now love my Fiskars scissors!)
-- double-stick iron-on transfer paper (I used Steam-a-Seam, but there are several brands available at craft stores or Wal Mart, etc.)
-- Fray Check or other liquid fray guard (also available at craft stores or the craft section of Wal Mart)
-- The design you want to applique, unless you can draw it freehand (see below)

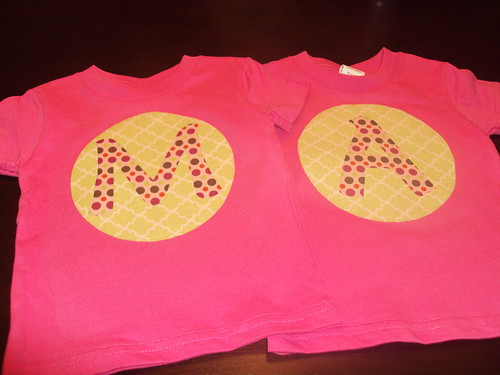
For my last project, I did the girls' initials and a double layer of fabric (the initial and circle in contrasting fabric).  For that project, I printed the "A" and "M" in a font I liked, then used a copy maching to enlarge it to the size I wanted the letters to be on the shirt.  You could use the same process for any simple design you can find a picture of online.  This time, since I decided to just do a simple heart, so I drew it myself.

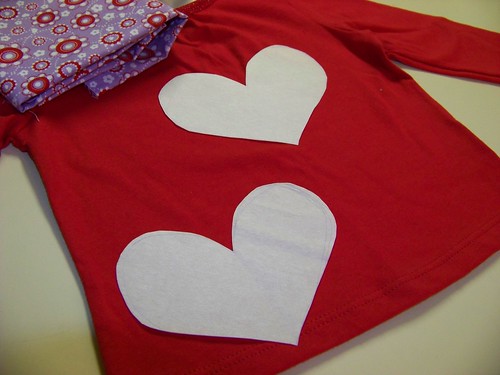
Step 1:  Trace (or draw) your design onto the transfer paper. 
One side of the paper will peel away from the sticky webbing easily...you want to draw on the section that is more securely stuck to the webbing. 

Step 2:  Cut out your design.

100_1963

Step 3:  Peel away one side of the paper from the sticky webbing (the side that comes away easily) and stick your fabric to your design.  Using your iron-on paper as a guide, cut your design into the fabric.  This is where the good scissors come in handy!
*Note--You can combine steps 1-3 by sticking the fabric to the transfer paper first, then cutting both together.  I prefer to cut the paper first, where I can more easily make adjustments to the shape before I start working with the fabric.

You are now left with fabric attached to the iron-on transfer paper in the shape of your design:
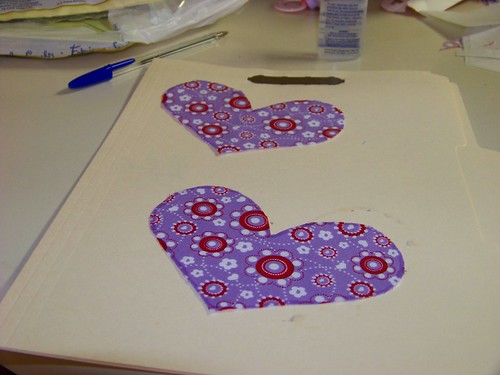
100_1971

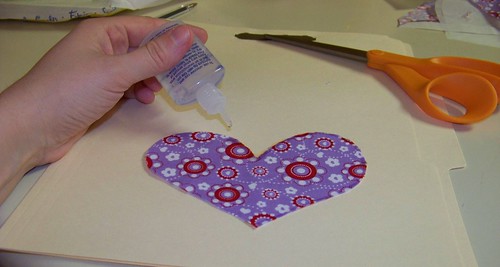
Step 4:  Apply a coating of Fray-Check liquid fray guard to the outer edge of the fabric.  It will turn the outside edge a little darker for awhile (you can probably tell in the picture below), but this won't be noticed once it dries.
100_1968

Step 5:  Allow the fray guard to dry for about 15-20 minutes, then trim any stray fibers so you are left with a fairly smooth edge to your applique.  If I trim more in a certain area, I might apply a second coat of fray guard to that spot.

The hardest part is done now!  : )

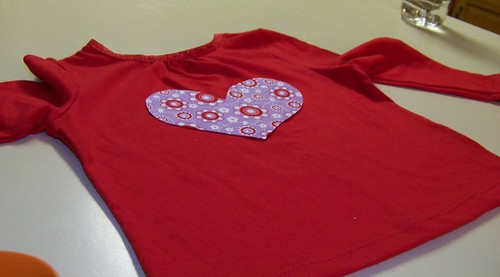
Step 6:  Arrange your applique on the shirt to get the placement the way you want it.  When you have it in the right spot, peel away the remaining side of the transfer paper and stick the applique to the shirt.  (It will be sticky enough to hold its place, but can still be easily moved if you need to adjust.)

100_1972

100_1970

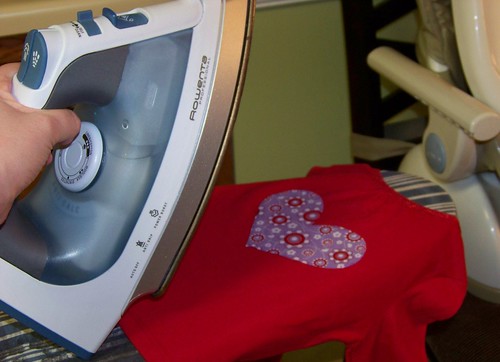
Step 7:  Iron!  After making sure your applique is positioned exactly as you want it, press firmly over the design with a steam iron for about 30 seconds. 
100_1974

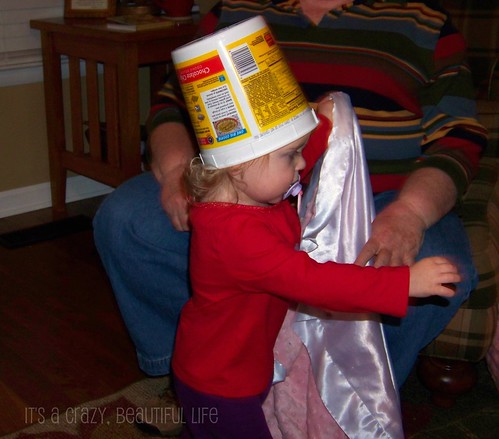
And...ta-daaa!  There you have it.  Easy-peasy, right?

In fact, you just might find that the hardest part of the whole project
100_1979

is getting a good picture

100_1981

of your models.

100_1983

Or maybe that's just me.
9.23.2010

Getting Crafty

I have a slight obsession with pretty fabrics.  I can spend hours looking at fabrics, imagining all the things I could do with the beautiful patterns and textures.  And yet...I never do.  Problem #1 would be that I can't sew.  Not at all.  If Jeremy loses a button on a shirt, he fixes it himself and does it far better than I would.  We don't own a sewing machine, and although there have been a few fleeting moments when I imagined that I might learn to use one, I have no immediate plans to obtain one.

So, I have to limit myself to crafts that don't require sewing....which, when we're talking about fabrics, are relatively limited. 

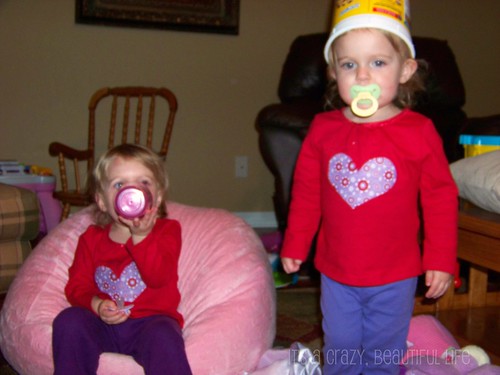
Last week I managed to put together these shirts for the girls, and I was pretty pleased with how they turned out:

Crafty!

Suprisingly, they held up through the first washing, so I'm counting it as a success.  I used two different fabrics, printed out some letters to trace and cut out, then used iron-on-transfer paper to adhere everything to the shirt.  I used some FrayCheck glue around the edges, and voila!  Crafty, huh?

Next up:  Halloween shirts!  I am hoping to go hunt for fabric this weekend if I can get a few minutes hours out of the house.